 Save
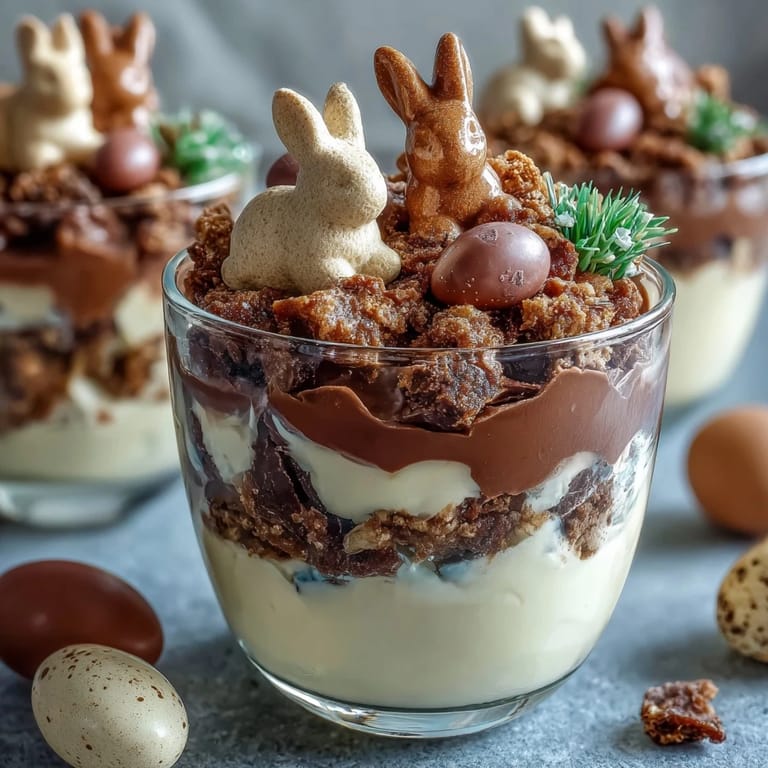
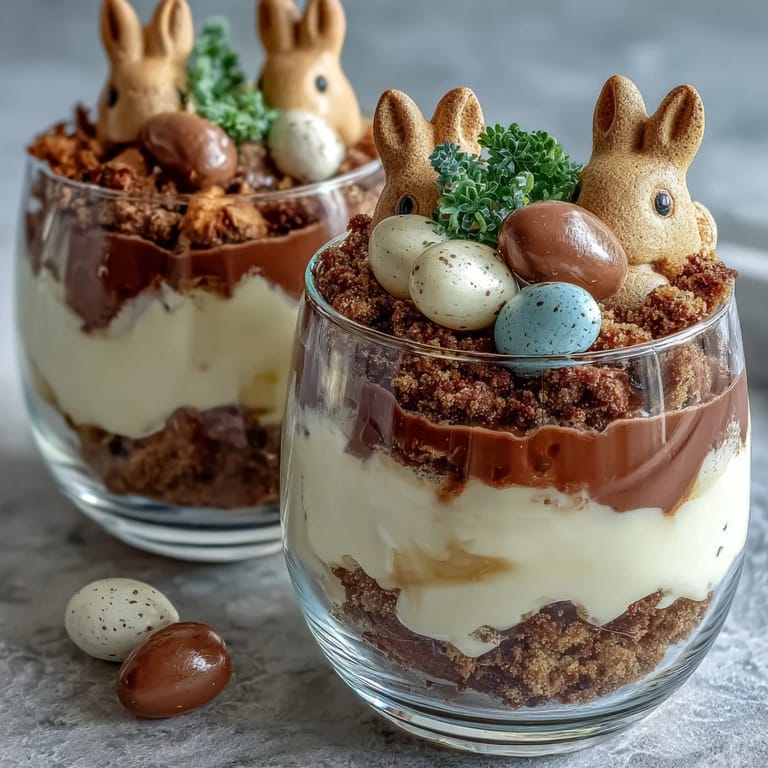
Save My daughter's eyes went wide the moment she spotted those little bunny Peeps sitting upright in the chocolate dirt—she didn't even wait for me to finish explaining what they were before declaring this the best Easter dessert ever created. That's when I realized these cups weren't really about the pudding or the cookies; they were about watching a five-year-old's imagination turn a simple layered cup into an edible garden where candy bunnies came to life. The no-bake nature meant we could throw them together while she sat at the counter, and somehow her excitement made the whole kitchen feel like we were creating something magical instead of just mixing pudding. What started as a Pinterest scroll on a random Tuesday became our Easter tradition within minutes.
I made a batch for my nephew's classroom Easter party, and watching twenty second-graders approach these little cups with such reverence—some even hesitating before disrupting the cute bunny on top—taught me that sometimes food is more about the experience than the taste. One kid asked if he could take a picture before eating his, another carefully excavated around the bunny to save it for last. Those ten minutes of controlled chaos in that classroom reminded me why simple, playful food matters so much during the holidays.
Ingredients
- Cold whole milk: Room temperature milk won't set your pudding properly, so this needs to come straight from the fridge—learned that the hard way on my first attempt when everything stayed soupy.
- Instant chocolate pudding mix: The 3.9 oz package is the standard size, and whisking it vigorously for the full two minutes actually makes a difference in texture rather than just eyeballing it.
- Chocolate sandwich cookies: Oreos are classic, but store brands work perfectly fine and sometimes have a better texture for crushing into fine crumbs.
- Whipped topping: Cool Whip from the freezer section stays sturdier than homemade whipped cream and handles the weight of the cookie layer without deflating.
- Marshmallow bunny Peeps: These are the star of the show, so pick ones that appeal to you—some years pink, some yellow, and honestly the variety keeps it fresh.
- Candy-coated chocolate eggs: The mini versions pack more punch visually than the larger ones, and they nestle perfectly into the cookie crumbs without sinking.
- Green-tinted shredded coconut: This is optional but transforms the whole thing from cute to genuinely garden-like, and you can find it pre-tinted or tint plain coconut yourself with a few drops of food coloring.
Tired of Takeout? 🥡
Get 10 meals you can make faster than delivery arrives. Seriously.
One email. No spam. Unsubscribe anytime.
Instructions
- Mix your chocolate base:
- Whisk the cold milk with pudding mix for a full two minutes—you'll feel the resistance change as it thickens, and that's exactly when you know it's done. Let it rest for five minutes while you prepare everything else so it reaches that perfect spoonable consistency.
- Crush the cookies:
- Seal your chocolate cookies in a zip-top bag and go to town with a rolling pin; the crushing is honestly satisfying and the kids love helping with this part. You want varying sizes of crumbs, not a fine powder—some texture makes it feel more like actual dirt.
- Layer the pudding:
- Spoon about a quarter cup of pudding into the bottom of each clear cup, and clear cups really do make a difference because you get to see those beautiful layers. This layer should be thick enough to support everything on top but not so thick that you run out before the top.
- Add the cloud layer:
- A heaping tablespoon of whipped topping goes next, and smooth it out gently so it creates a nice cushion between the pudding and your cookie dirt. This layer keeps everything from getting soggy and gives you that visual contrast that makes the cup so appealing.
- Create the dirt:
- Sprinkle two to three tablespoons of crushed cookies over the whipped topping, making sure to cover it completely so it actually looks like a little garden bed. Don't hold back here—more cookies mean more authenticity, and honestly, more deliciousness.
- Plant your bunny:
- Gently press a marshmallow bunny Peeps into the center of the cookie layer so it stands upright like it's actually sitting in dirt. Press it in with just enough pressure to stay put but not so much that you squish your marshmallow into a pancake.
- Decorate and finish:
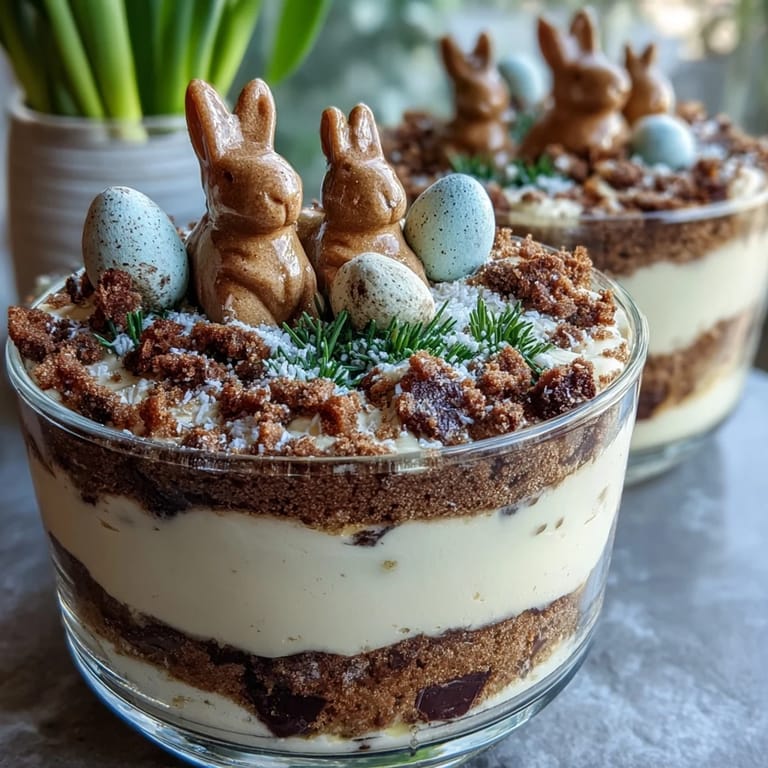
- Scatter your candy eggs around the bunny and sprinkle green coconut to look like grass, creating a little Easter scene right there in the cup. This is where it stops being just dessert and becomes a tiny work of art that people almost feel bad eating.
- Serve or chill:
- These can go straight to the table or hide in the fridge until party time—they actually improve slightly as everything melds together over a few hours. Either way, they're best enjoyed within a few hours while the textures are still distinct and that marshmallow bunny hasn't started to soften too much.
 Save
Save There's something unexpectedly sweet about watching someone's face light up when they realize the bunny on top is meant to be eaten—that moment when whimsy meets appetite is when these cups transcend being just another Easter dessert. My sister texted me a photo a year later saying her kids still ask for "the bunny dirt cups" at Easter, and somehow that became more meaningful than any complicated recipe ever could.
Making These Kid-Friendly (Or Not)
The beauty of this recipe is that it genuinely works for any age group—I've made adult versions that swapped the pastel Peeps for dark chocolate shards and used crushed biscotti instead of Oreos, creating something sophisticated without losing the playful spirit. For younger kids, let them do the crushing, the layering, even pressing in the bunnies themselves, because the pride they feel when they eat something they assembled is worth all the spilled pudding and misaligned layers. The decorating phase is where every person in the room gets to express their own version of what the cup should look like, which is actually the entire point.
Storage and Make-Ahead Strategy
These are best assembled within a few hours of serving because the texture contrast between layers is the real star—pudding, whipped topping, and cookies all maintain their distinct personalities during that window. If you need to prep ahead, mix your pudding and layer the cups up to the cookie crumble stage, then add the bunny and final decorations right before serving to preserve that freshness. I've learned the hard way that overnight storage turns everything into a sad brown pudding soup, so same-day assembly really is the way to go.
Variations and Personal Touches
The formula here is flexible enough that you can swap pudding flavors—vanilla with colored sprinkles, butterscotch, or even the trendy cookies and cream pudding—and it still captures that same Easter magic. Some years I've added gummy worms to the dirt layer for an extra creepy element, and one memorable Easter I experimented with crushed graham crackers mixed with the cookies for lighter texture and a slightly less sweet result. You can also substitute the candy eggs with mini chocolate bunnies, jelly beans, or even crumbled chocolate bunny pieces depending on what you find at the store.
- If you can't find green-tinted coconut, blend regular coconut with a drop of green food coloring in a small bag until it's evenly distributed.
- Make a nut-free version by checking that your cookies and candies are processed in certified nut-free facilities, which matters more than the ingredients themselves.
- These freeze surprisingly well for up to a week if you cover them tightly—just thaw for five minutes before serving.
 Save
Save These little cups represent everything I love about seasonal cooking—minimal effort, maximum joy, and a recipe that somehow becomes a memory the moment you make it. Every Easter now, someone asks if we're making the bunny dirt cups, and that's when I know I've done something right.
Recipe Questions & Answers
- → Can I use homemade pudding instead of instant mix?
Absolutely. Freshly made chocolate pudding can add a richer flavor and creamier texture to the layers.
- → What is the best way to crush the cookies?
Place cookies in a zip-top bag and use a rolling pin to crush them into fine crumbs evenly.
- → Are there alternatives to marshmallow bunny decorations?
You can substitute with chocolate bunnies or any Easter-themed candies to suit preferences.
- → Can these cups be prepared in advance?
Yes, assemble and refrigerate until serving; this helps the layers set and flavors meld.
- → Is it possible to make these cups nut-free?
Ensure all ingredients like cookies and candies are processed in nut-free facilities to avoid allergens.