 Save
Save My neighbor knocked on my door one Thursday evening holding a lemon and asking if I had any chicken. She'd just come back from visiting her sister in New Jersey and couldn't stop talking about this little Italian spot where they served chicken cutlets so thin and golden you could see the plate through them. We ended up in my kitchen, pounding chicken breasts with a wine bottle because I couldn't find my mallet, laughing so hard we nearly woke the whole building. That night, we figured out that the secret wasn't just in the breading, it was in not overthinking it.
I made these cutlets for my cousin's birthday dinner last spring, and halfway through frying the second batch, the oil started smoking because I got distracted by someone's story. I turned the heat down, opened a window, and kept going. When I brought the platter to the table, nobody said a word about the faint smell of burnt oil still hanging in the air. They just kept reaching for more chicken, squeezing lemon over everything, and that felt like the biggest compliment I could've gotten.
Ingredients
- Boneless, skinless chicken breasts (4, about 150 g each): Pounding them thin is the whole game here because thick chicken never cooks evenly, and you'll end up with a burnt crust and raw center.
- Large eggs (2): They're the glue that makes everything stick, and adding a splash of milk loosens them up so the coating goes on smooth.
- Milk (2 tablespoons): Just enough to thin out the eggs without making them watery.
- Grated Parmesan cheese (1 cup, 100 g): Use the real stuff if you can, the kind you grate yourself, because the pre-shredded version doesn't melt or crisp the same way.
- Panko breadcrumbs (1 cup, 100 g): These stay crunchier than regular breadcrumbs and give you that restaurant-style texture.
- All-purpose flour (1/2 cup, 60 g): It's the first layer that dries out the chicken so the egg can grab on.
- Garlic powder (1 teaspoon): Adds a subtle background flavor that makes people wonder what you did differently.
- Dried oregano (1 teaspoon): A little herby note that ties the whole thing to its Italian roots.
- Salt (1/2 teaspoon): For seasoning the chicken before it even hits the breading.
- Black pepper (1/2 teaspoon): Just enough to wake everything up without overpowering the Parmesan.
- Olive oil (1/3 cup, 80 ml): You need enough to come halfway up the sides of the chicken so it fries instead of steams.
- Lemon wedges: A squeeze of lemon at the end cuts through the richness and makes every bite feel lighter.
- Fresh parsley, chopped (optional): Mostly for looks, but it does add a fresh little pop if you've got it.
Tired of Takeout? 🥡
Get 10 meals you can make faster than delivery arrives. Seriously.
One email. No spam. Unsubscribe anytime.
Instructions
- Pound the chicken thin:
- Place each breast between two sheets of plastic wrap and use a meat mallet or rolling pin to pound them to about half an inch thick. This is where you get out any frustration from the day, and it also ensures the chicken cooks fast and stays tender.
- Season with care:
- Sprinkle both sides of each piece with salt and pepper. Don't skip this step because the breading won't season the meat itself.
- Set up your breading station:
- Grab three shallow bowls and fill the first with flour, the second with eggs whisked with milk, and the third with panko, Parmesan, garlic powder, and oregano mixed together. Line them up like an assembly line so you can move quickly.
- Coat each cutlet:
- Dredge the chicken in flour, shake off the extra, dip it in the egg wash, then press it into the Parmesan breadcrumb mixture on both sides. Make sure every inch is covered or you'll get bald spots that won't crisp up.
- Heat the oil properly:
- Pour the olive oil into a large skillet and set it over medium-high heat. Let it get hot enough that a breadcrumb sizzles when you drop it in, but not so hot that it smokes right away.
- Fry until golden:
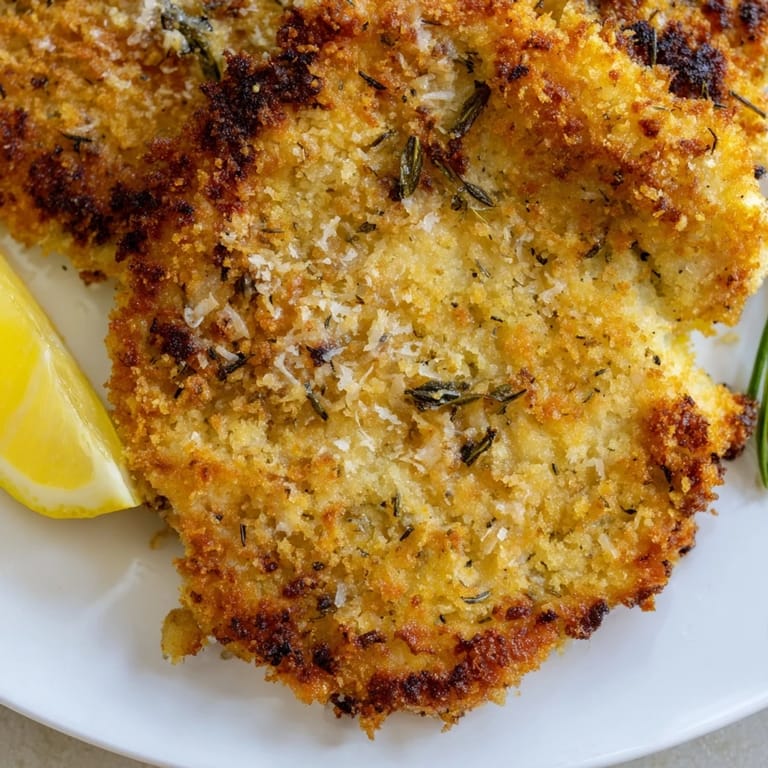
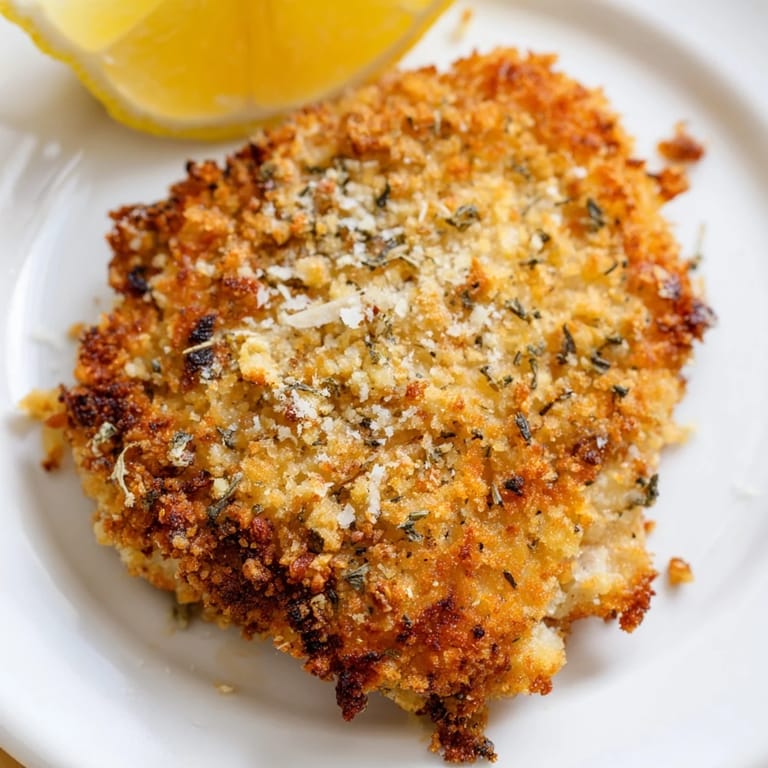
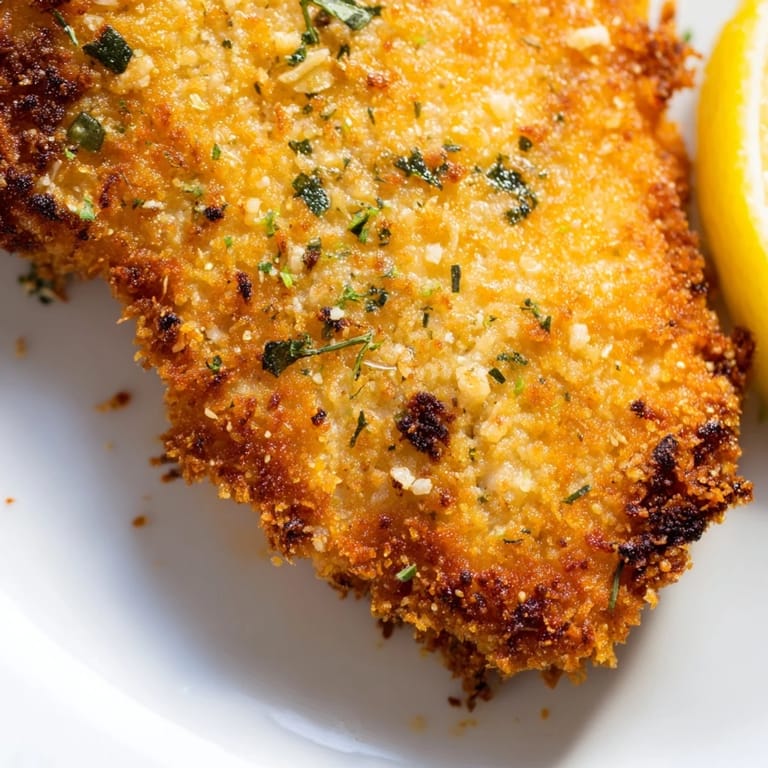
- Add the chicken cutlets in batches, don't crowd the pan, and cook for three to four minutes per side until the crust is deep golden and the internal temperature hits 165 degrees Fahrenheit. Use tongs to flip them gently so the coating doesn't fall off.
- Drain and rest:
- Transfer the cooked cutlets to a plate lined with paper towels to soak up the excess oil. Let them sit for a minute before serving so the crust sets.
- Serve with brightness:
- Plate them up with lemon wedges on the side and a sprinkle of chopped parsley if you're feeling fancy. The lemon is non-negotiable.
 Save
Save There was this one Sunday afternoon when I made a double batch of these because my brother was bringing friends over to watch a game. I piled them on a big cutting board with lemon halves and a bowl of arugula on the side, and people just stood around the kitchen eating with their hands, talking over each other. Nobody sat down for an hour. That's when I realized some recipes aren't really about sitting at a table, they're about keeping people in the room.
What to Serve Alongside
These cutlets are rich enough to stand on their own, but they're even better with something bright and leafy next to them. I usually toss arugula with olive oil, lemon juice, and shaved Parmesan, and pile it right on top of the chicken while it's still warm. The greens wilt just a little from the heat, and it turns into this perfect one-plate situation. If you want something heavier, a simple pasta with garlic and olive oil works, or roasted vegetables if you're trying to feel virtuous.
How to Store and Reheat
I used to think breaded chicken was a lost cause the next day, but then I learned to reheat it in the oven instead of the microwave. Just spread the leftovers on a baking sheet and warm them at 375 degrees Fahrenheit for about ten minutes. The crust crisps back up, and the chicken stays juicy. You can keep them in the fridge for up to three days, and honestly, cold cutlets on a sandwich with mayo and lettuce are their own kind of magic.
Small Tweaks That Make a Difference
If you want a little heat, mix a pinch of chili flakes into the breadcrumb mixture. It won't make it spicy, just interesting. Some people like to add lemon zest to the breading for extra brightness, and I've done that when I'm feeling ambitious. You can also swap the Parmesan for Pecorino Romano if you want something sharper and saltier.
- Press the breadcrumbs on firmly with your palms so they don't fall off in the pan.
- Let the chicken rest for a minute after breading and before frying so the coating has time to stick.
- Use a splatter screen if you have one because this can get messy fast.
 Save
Save This is one of those recipes that makes you look like you know what you're doing, even if you're figuring it out as you go. Keep the heat steady, don't rush the breading, and remember that the lemon is half the reason it works.
Recipe Questions & Answers
- → How thick should I pound the chicken breasts?
Pound each breast to approximately 1/2 inch (1.25 cm) thickness. This ensures even cooking and helps the cutlets cook through quickly while developing a crispy exterior.
- → Can I use regular breadcrumbs instead of panko?
Yes, you can use regular breadcrumbs, though panko provides superior crispiness due to its larger, airier texture. For maximum crunch, panko is recommended.
- → What's the best oil for frying these cutlets?
Olive oil works beautifully and adds authentic Italian flavor. Vegetable oil or canola oil are also excellent neutral options. Use medium-high heat to achieve golden browning without burning the coating.
- → How do I know when the chicken is fully cooked?
The internal temperature should reach 74°C (165°F) when measured with a meat thermometer at the thickest part. The exterior will be golden brown and crispy when done.
- → Can I make these ahead and reheat them?
Yes, leftovers reheat well in a 180°C (350°F) oven for about 10 minutes. This method restores crispiness better than microwaving. You can also refrigerate breaded cutlets before cooking for up to 24 hours.
- → What sides pair best with crispy Parmesan cutlets?
Fresh arugula salad, pasta with marinara sauce, creamy risotto, or roasted vegetables all complement this dish beautifully. Serve with lemon wedges for brightness.