 Save
Save My neighbor showed up at my door with a box of these tiny cheesecakes last spring, and I was instantly hooked—not just by how they tasted, but by how she'd arranged them on a tiered stand like little edible jewels. She mentioned they were her secret weapon for housewarming gifts, and watching her describe the creamy centers and crisp crusts made me determined to master them myself. There's something magical about a dessert small enough to eat in two bites yet impressive enough to make people feel celebrated. These mini cheesecakes became my answer to every "what should I bring" question that followed.
I'll never forget the moment my sister walked into my kitchen while I was removing these from the oven—the smell of buttery crust mixed with creamy cheesecake filling filled the entire first floor, and she literally stopped in her tracks. She grabbed one the moment they cooled enough to eat, and the way her face softened told me everything. Since then, these have become the unofficial dessert of every gathering at my place, and people have started requesting them by name rather than just asking what I'm bringing.
Ingredients
- Graham cracker crumbs: Use finely crushed ones for a more even, compact crust that won't crumble when you bite in.
- Granulated sugar (for crust): This helps the crust bind together and adds a subtle sweetness that complements the rich filling.
- Unsalted butter, melted: Make sure it's actually melted and slightly cooled so it distributes evenly through the crumbs.
- Cream cheese, softened: Room temperature cream cheese blends smoothly—take it out of the fridge at least 30 minutes before you start, or microwave it for 10-second intervals until it's soft but not melting.
- Granulated sugar (for filling): This sweetens the filling and creates that silky texture cheesecake lovers crave.
- Large eggs: Add them one at a time and mix gently to avoid incorporating too much air, which can cause cracks.
- Sour cream: This tangy ingredient prevents the cheesecake from becoming dense and adds moisture that keeps it creamy after baking.
- Vanilla extract: A full teaspoon gives you that classic cheesecake flavor without any competing notes.
- All-purpose flour: Just a tablespoon stabilizes the filling so it sets properly without becoming rubbery.
- Salt: A pinch enhances all the other flavors and prevents the filling from tasting flat or one-dimensional.
Tired of Takeout? 🥡
Get 10 meals you can make faster than delivery arrives. Seriously.
One email. No spam. Unsubscribe anytime.
Instructions
- Prepare your workspace and oven:
- Set your oven to 325°F and line your 24-cup mini muffin tin with paper liners—this is non-negotiable if you want them to pop out cleanly. Having everything ready before you start mixing is the difference between a relaxed baking session and one where you're scrambling.
- Create the crust:
- Mix your graham cracker crumbs, sugar, and melted butter in a bowl until it looks like wet sand, then press about a heaping teaspoon of this mixture firmly into each liner. The pressure matters here—a loose crust will crumble when you bite, so take a moment with each one and really press it down.
- Prepare the creamy filling:
- Beat your softened cream cheese until it's completely smooth and creamy, then add the sugar and mix until you don't see any grainy bits. Add your eggs one at a time, beating gently after each addition so you're folding them in rather than whipping air into the mixture.
- Finish the filling with care:
- Gently stir in the sour cream, vanilla, flour, and salt until everything is just combined—overmixing at this stage is what causes cracks on top. You want a smooth, velvety batter that looks glossy.
- Fill and bake:
- Spoon the filling into each crust-lined cup until it's nearly full, leaving just a sliver of space at the top. Bake for 18-20 minutes until the edges are set but the very center still jiggles slightly when you gently tap the pan—this jiggle is how you know they'll be creamy, not dense.
- Cool and chill:
- Let them sit in the pan for 15 minutes after you pull them from the oven, then transfer them to a wire rack to cool completely. Once they're room temperature, pop them in the refrigerator for at least an hour, though overnight makes them even better.
 Save
Save There was this one afternoon when I brought a box of these to my colleague who'd just bought her first home, and she cried—actually cried—when she opened the box and saw them arranged on parchment paper with fresh berries on top. She told me later that the gesture meant more to her than she could express, and something clicked for me about why these little cakes mattered so much. They're not just dessert; they're a way of saying "I'm thinking of you" in a form that's both elegant and comforting.
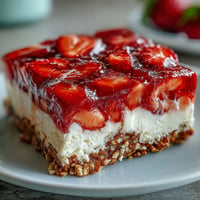
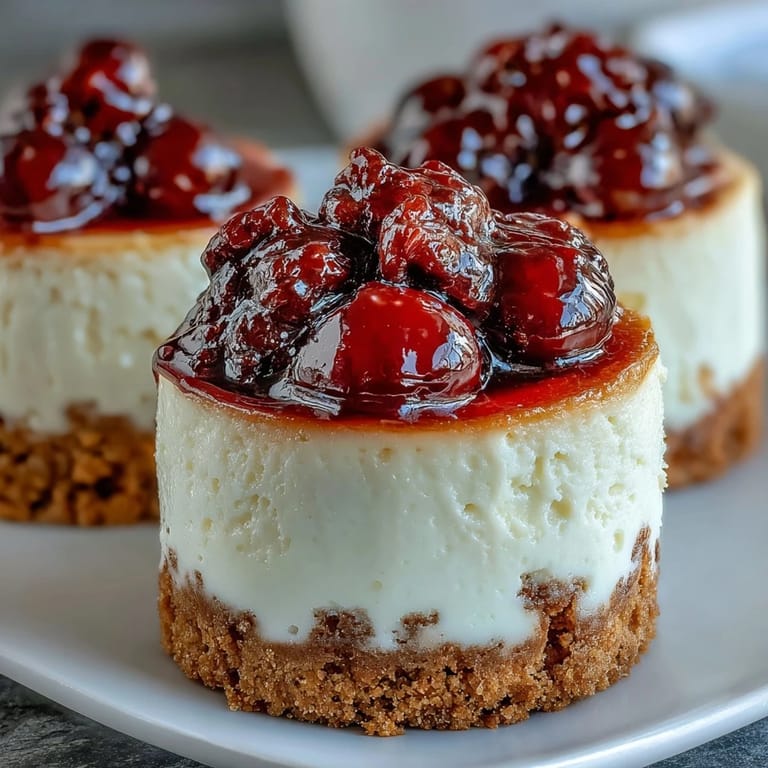
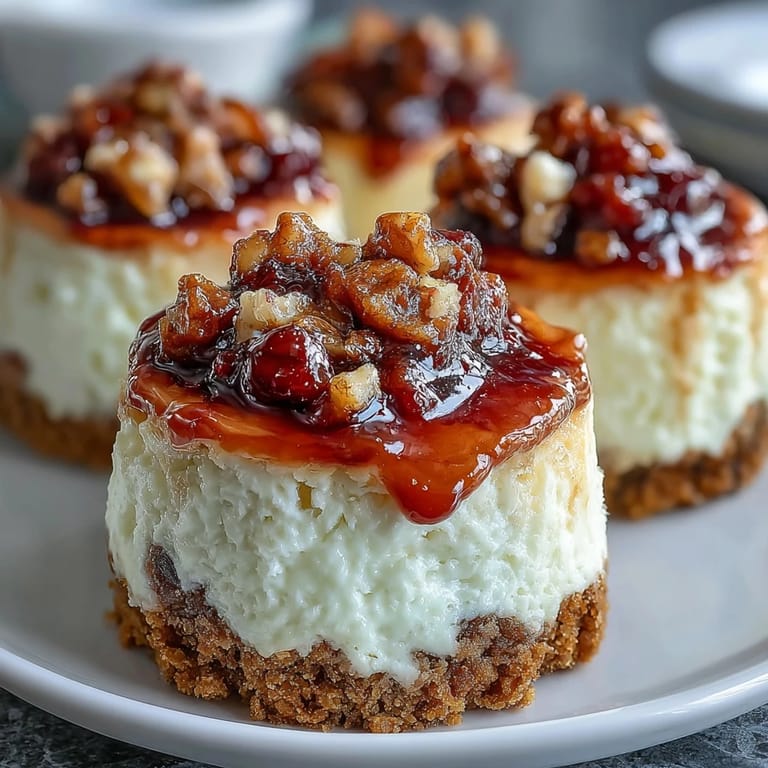
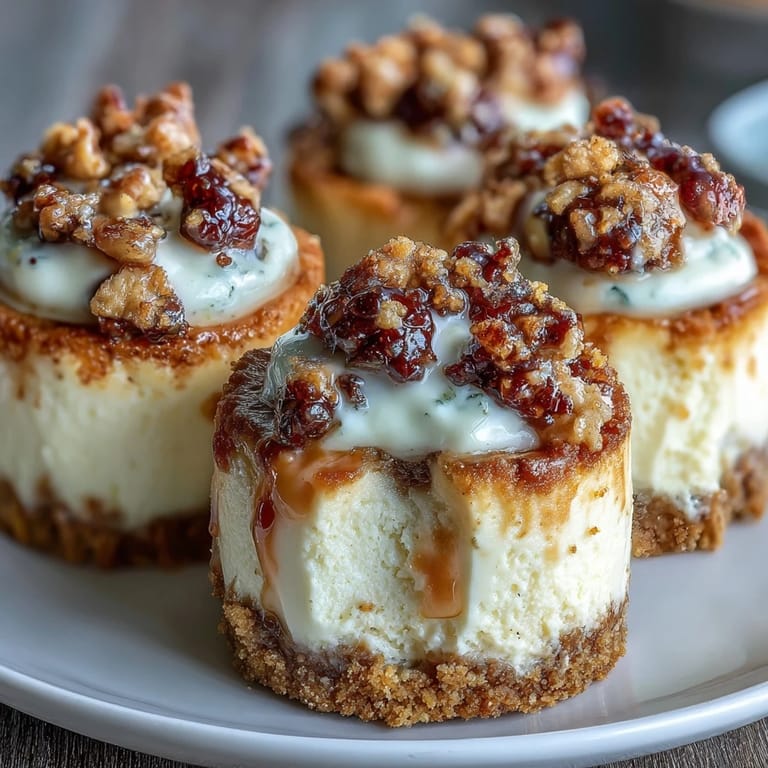
Topping Ideas That Transform Them
The beauty of these mini cheesecakes is that you can dress them up however you want depending on the occasion or your mood that day. Fresh berries are the classic choice and work because their tartness plays beautifully against the sweet, creamy filling. I've also gotten adventurous with a drizzle of salted caramel, a spoonful of lemon curd, or even a tiny dollop of Nutella topped with a crushed hazelnut.
Make-Ahead Magic
One of my favorite things about this recipe is that you can make them a full day ahead, which takes so much pressure off when you're hosting. Store them in an airtight container in the fridge, and they actually taste even better the next day as all the flavors settle and marry together. Just add your toppings right before serving so they stay fresh and don't get soggy—the crust stays crisp and the filling stays velvety smooth.
Storage, Variations and Kitchen Wisdom
These keep beautifully in the refrigerator for up to three days, and I've even frozen them successfully for up to a month if you wrap them individually in plastic wrap and then store them in a freezer container. For a citrusy twist that my mom requests constantly, add a tablespoon of fresh lemon zest to the filling along with the vanilla—it brightens everything without overpowering the cream cheese. I've also tried swapping the vanilla for almond extract or adding a teaspoon of cinnamon to the crust, and both variations felt like discovering secret menu items.
- For a gluten-free version, swap the regular graham crackers and all-purpose flour for their gluten-free counterparts and nobody will know the difference.
- If you don't have a mini muffin tin, you can bake these in regular cupcake liners for 22-25 minutes instead—they'll just be slightly larger.
- The paper liners are your friend here because they make removing the cheesecakes effortless and keep your hands clean.
 Save
Save These tiny cheesecakes have become my shorthand for "you matter to me," and every time I bake a batch, I remember that neighbor who started it all. There's real magic in something so small that brings so much joy.
Recipe Questions & Answers
- → What is the best way to achieve a crisp crust?
Mix graham cracker crumbs with melted butter and sugar thoroughly, then press firmly into mini muffin liners to form an even base before baking.
- → How long should the cheesecakes chill before serving?
Chill for at least one hour to allow the filling to firm up and develop the best texture.
- → Can these mini cheesecakes be made gluten-free?
Yes, substitute gluten-free graham crackers and flour to accommodate dietary needs without compromising taste.
- → What toppings complement these cheesecakes well?
Fresh berries, fruit preserves, whipped cream, and chocolate shavings all enhance the creamy and crunchy elements beautifully.
- → Is it possible to prepare these ahead of time?
Absolutely, these can be made a day in advance and stored refrigerated to save time on the day they are served.