 Save
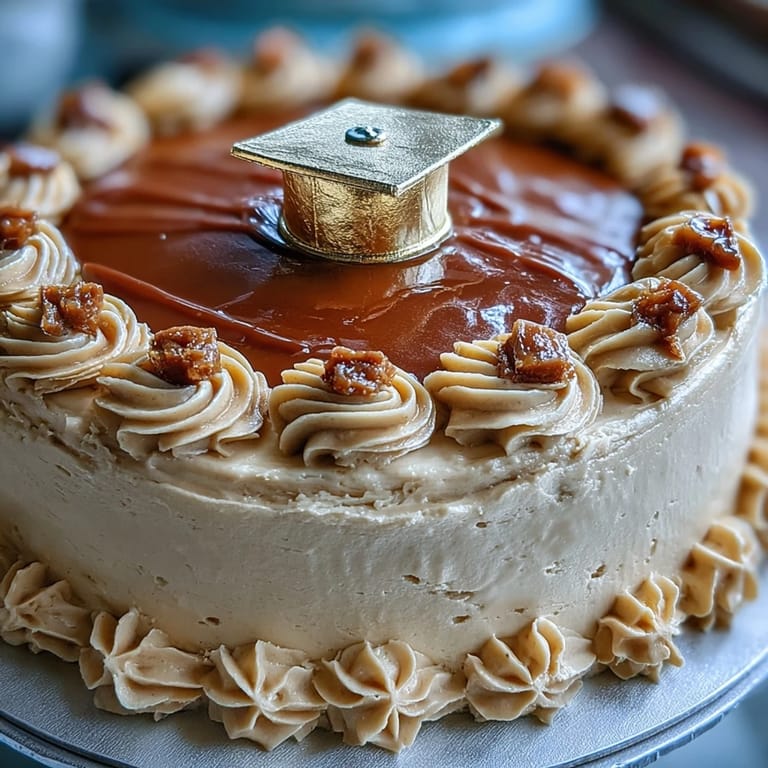
Save My hands were shaking a little as I pulled this cake from the oven, knowing it had to be perfect for my neighbor's daughter's graduation party. There's something about baking for a milestone moment that makes you want everything to turn out just right, and this vanilla sponge with its tender crumb and that luxurious buttercream felt like the right way to say congratulations. The edible gold foil caught the light as I positioned it carefully, and suddenly what had been ingredients in my bowl transformed into something that actually felt celebratory.
I watched the birthday girl's face when she saw the cake sitting on the dessert table, the way her eyes went right to the diploma topper and the shimmer of gold catching the afternoon light. Someone asked if it came from a bakery, which made me laugh because here I was, covered in a little powdered sugar, explaining that I'd made it in my own kitchen that morning. Those are the moments that make the butter-beating and the careful frosting work feel worthwhile.
Ingredients
- All-purpose flour (2 ½ cups): The foundation of your cake's structure; make sure it's not packed down when you measure, or you'll end up with a dense result instead of that tender crumb you're after.
- Baking powder (2 ½ tsp): This gives the cake lift and keeps it from tasting flat; make sure yours isn't expired or the cake will be disappointingly heavy.
- Unsalted butter for cake (1 cup): Room temperature is non-negotiable here because cold butter won't cream properly and you'll lose all that airiness you worked to build.
- Granulated sugar (2 cups): This sweetens the cake and helps create that light, fluffy texture when beaten with the butter.
- Eggs (4 large, room temperature): Cold eggs don't incorporate as smoothly, so pull them out of the fridge about 30 minutes before you start baking.
- Vanilla extract (1 tbsp for cake): Use real vanilla if you can; the flavor difference is subtle but noticeable and makes the whole cake taste more sophisticated.
- Whole milk (1 cup, room temperature): Just like the eggs, cold milk can seize up the batter, so let it sit out while you're creaming your butter and sugar.
- Unsalted butter for frosting (1 ½ cups): The buttercream won't be silky unless this is also at room temperature; I learned this the hard way when I made lumpy frosting one afternoon.
- Powdered sugar (5 cups, sifted): Sifting removes lumps and makes your frosting smooth and spreadable rather than grainy and frustrating.
- Vanilla extract for frosting (2 tsp): A bit more vanilla in the frosting balances the sweetness and gives it depth.
- Milk or heavy cream (3-4 tbsp): This loosens the frosting to the right consistency; heavy cream makes it richer and more luxurious if you want to splurge.
- Edible gold foil sheets: These are delicate and require dry hands or tweezers, but they transform the cake into something that feels truly special.
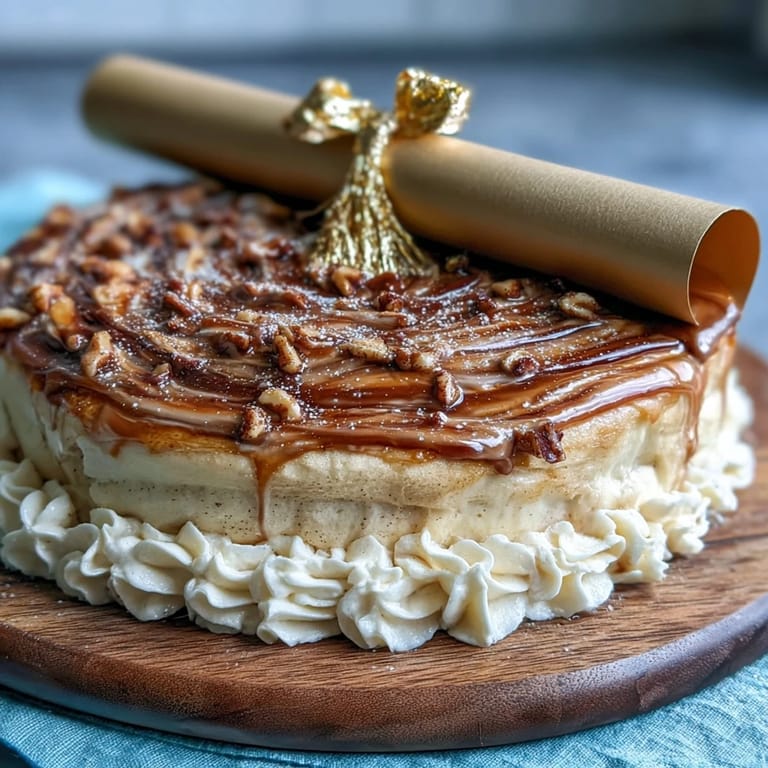
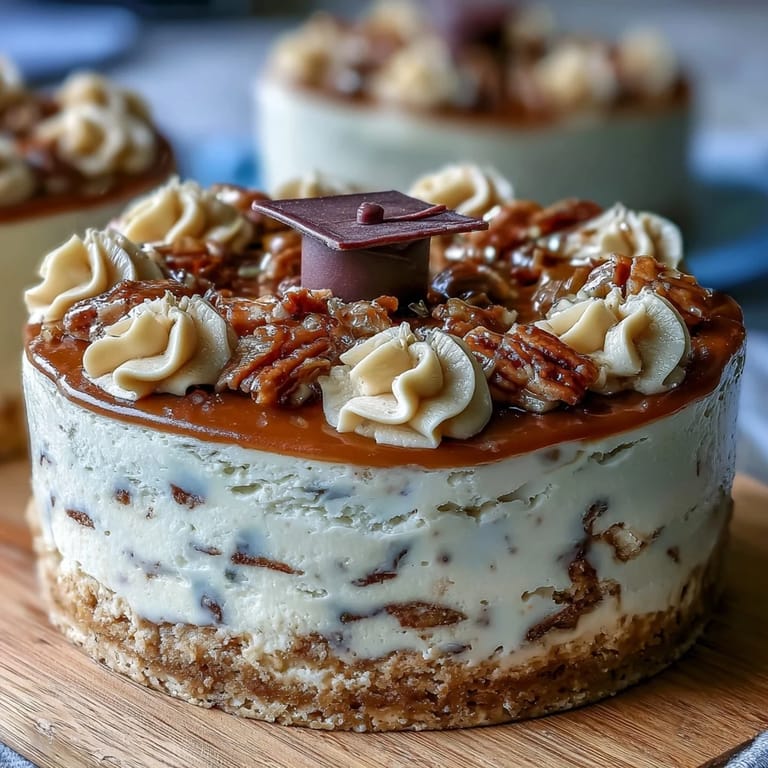
- Diploma topper: Store-bought is convenient, but a fondant version you make yourself feels more personal and is completely edible.
Tired of Takeout? 🥡
Get 10 meals you can make faster than delivery arrives. Seriously.
One email. No spam. Unsubscribe anytime.
Instructions
- Prepare your pans and preheat:
- Set your oven to 350°F and get it heating while you line two 9-inch round pans with parchment paper and a light coating of butter or baking spray. The parchment is crucial because it keeps the cake from sticking and tearing when you turn it out.
- Combine your dry ingredients:
- In a medium bowl, whisk together the flour, baking powder, and salt until they're evenly distributed. This step prevents lumps and ensures the leavening is spread throughout the batter.
- Cream butter and sugar:
- In your largest mixing bowl, beat the softened butter and sugar together on medium-high speed for 3 to 4 minutes until the mixture is light, fluffy, and noticeably pale. This is where you're incorporating air, which will make your cake light and tender instead of dense.
- Add eggs one at a time:
- Drop each egg in individually and beat well after each addition before adding the next one. This ensures each egg is fully incorporated and helps maintain that fluffy texture you've been building.
- Stir in vanilla:
- Once all the eggs are in, add your vanilla extract and mix until combined. The vanilla brings all those buttery, eggy flavors together into something that tastes like cake should taste.
- Alternate wet and dry ingredients:
- Add the flour mixture and milk to the butter mixture in three additions, starting and ending with flour, and mixing on low speed until just combined. Overmixing at this stage toughens the cake, so stop as soon as you don't see any flour streaks.
- Divide and bake:
- Divide the batter evenly between your prepared pans and smooth the tops, then bake for 28 to 32 minutes until a toothpick inserted in the center comes out clean or with just a few moist crumbs. The kitchen will smell incredible during this time, but resist the urge to open the oven door or you'll let heat escape.
- Cool the cakes:
- Let the pans sit on the counter for 10 minutes, then turn the cakes out onto wire racks to cool completely. They need to be completely cool before you frost them or the frosting will slide right off.
- Make the buttercream:
- Beat the softened butter on high speed for about 3 minutes until it's creamy and pale, then gradually add the sifted powdered sugar, a cup at a time, beating well between additions. This prevents lumps and makes the frosting smooth and spreadable.
- Season and finish the frosting:
- Add the vanilla extract, pinch of salt, and milk or cream a little at a time, beating until you reach a consistency that's thick enough to frost but soft enough to spread easily. You might not need all 4 tablespoons of milk, so go slowly.
- Level and layer:
- If your cakes have domed on top, trim them level with a serrated knife so they stack evenly, then place one layer on your serving plate and spread a thick, generous layer of buttercream on top. Think of this as the glue that holds your cake together.
- Add the second layer and crumb coat:
- Place the second cake layer on top, then spread a thin layer of frosting all over the outside to seal in any crumbs. Chill this for 30 minutes so the frosting sets and you have a clean canvas for your final coat.
- Apply final frosting:
- Use an offset spatula to apply the remaining frosting smoothly all over the cake, working on a turntable if you have one to make even coverage easier. Take your time here because this is what everyone will see.
- Apply gold foil with care:
- Using tweezers or dry fingers, carefully place sheets of edible gold foil onto the frosted cake in a pattern that feels right to you. The foil is delicate, but once it's on, it stays put and creates a luxurious, eye-catching effect.
- Add the diploma topper and final touches:
- Position your diploma topper at the center or off to one side, depending on your design, and add sprinkles or confetti if you like. Chill briefly to let everything set before serving at room temperature.
 Save
Save Watching everyone dig into that cake at the party, I realized it wasn't just about getting the layers even or making the gold foil look fancy. It was about knowing that I'd made something that meant something to someone on an important day, and that's what really made the cake taste better.
Why Temperature Matters More Than You Think
I used to think room temperature ingredients were just a suggestion until I made this cake with cold butter one morning because I was in a hurry. The frosting came out lumpy and grainy, the batter didn't incorporate properly, and the whole thing felt like I was fighting with the recipe instead of following it. Now I pull everything out of the fridge 30 to 45 minutes before I start, set a phone reminder, and make coffee while I wait. It's one of those small things that changes the outcome so completely that it feels like magic once you actually do it right.
Decorating Like You Know What You're Doing
The gold foil is where people always seem intimidated, but honestly, it's the easiest part of decorating this cake. The foil is thin and delicate, sure, but it's also forgiving because once it touches the frosting, it stays right where you put it. I use tweezers because it gives me more control and keeps my fingerprints off the delicate edges, and I work in a section at a time rather than trying to do the whole cake at once. The diploma topper sits on top like a little crown, and suddenly you've got a cake that looks like it came from a professional bakery.
Making This Cake Your Own
One of my favorite things about this recipe is how flexible it is for personalization without compromising the result. You can match the frosting to the school colors using gel food coloring, add almond extract to the batter for a subtle flavor shift, or even make the diploma topper from fondant and edible markers if you want everything to be completely edible. The cake itself is such a solid, reliable base that it gives you room to be creative without worrying about whether it will actually bake properly.
- Gel food coloring mixed into the frosting creates school colors without thinning out the frosting like liquid color would.
- A homemade fondant diploma is more personal and takes maybe 15 minutes if you have fondant on hand.
- Pair this cake with sparkling cider or champagne to make the whole celebration feel more festive and grown-up.
 Save
Save This cake has become my go-to for graduation parties and milestone celebrations because it tastes as wonderful as it looks, and it never lets me down. There's something special about handing someone a slice of cake you've made yourself, knowing that you put care and butter and vanilla into every layer.
Recipe Questions & Answers
- → How do I achieve a moist vanilla sponge?
Use room temperature eggs and milk, and mix the batter gently to avoid overworking the flour. Bake until a toothpick comes out clean for perfect moisture.
- → What’s the best way to apply edible gold foil?
Handle gold foil sheets with dry hands or tweezers and apply gently onto the frosted cake for a smooth, luxurious look without tearing.
- → Can I make the diploma topper edible?
Yes, create the topper using fondant and edible markers for a fully edible decorative element that complements the cake theme.
- → How do I ensure smooth buttercream frosting?
Beat softened butter until creamy, slowly add sifted powdered sugar, and adjust consistency with milk or cream for easy spreading and smoothing.
- → What can I use to add color matching school themes?
Gel food coloring in the buttercream allows vibrant and customizable colors to represent school colors effectively.