 Save
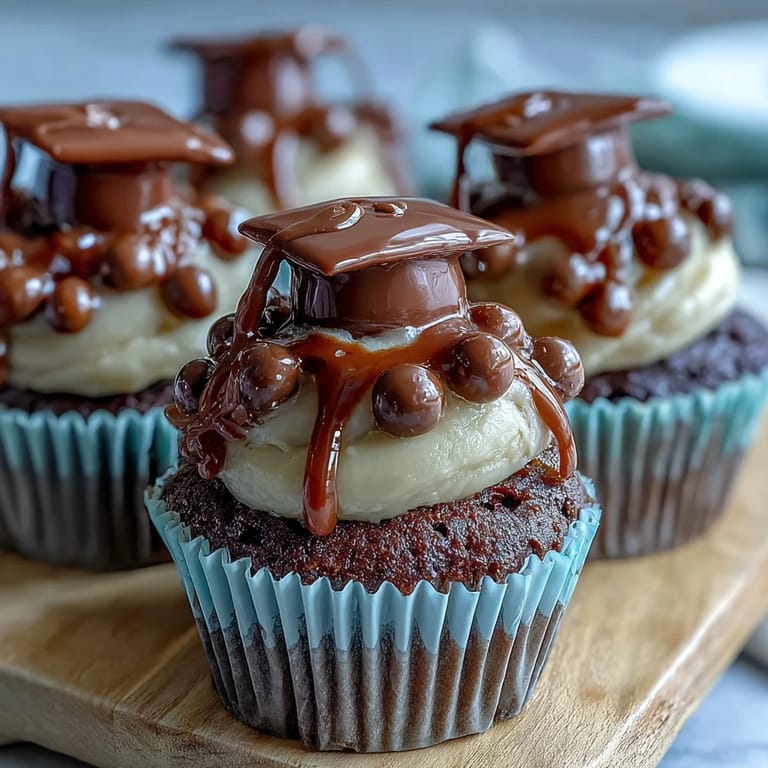
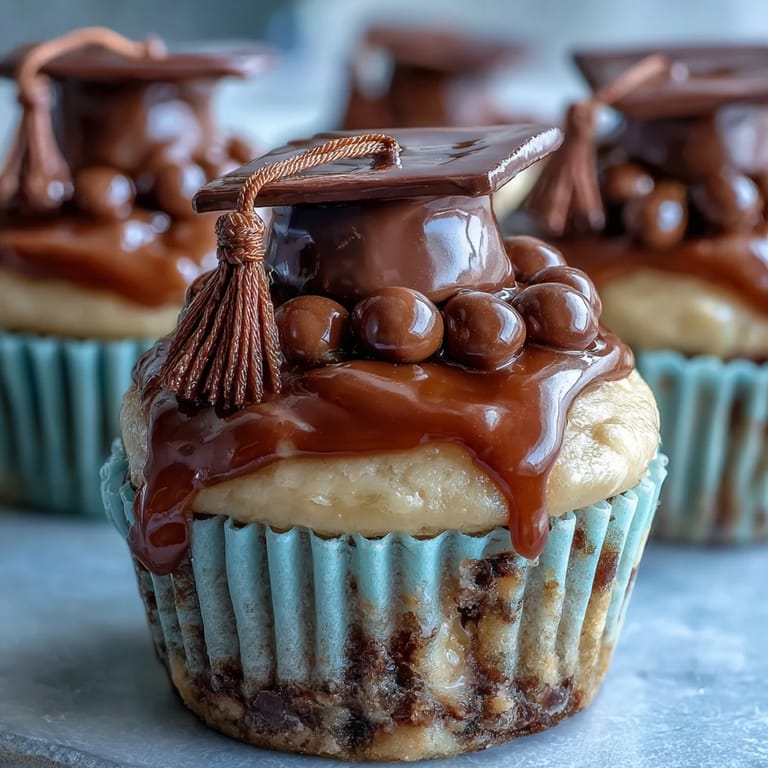
Save My cousin called me in a panic two weeks before her graduation, asking if I could make something special for her party that wouldn't require professional baking skills. I suggested these graduation cap cupcakes, and watching her face light up when I described the edible toppers made me realize how perfect they were for marking that moment. These aren't fussy or complicated—they're just pure celebration in cupcake form, the kind of thing that makes people smile before they even take a bite.
I'll never forget the moment I handed my cousin the box of finished cupcakes at her pre-graduation dinner. Her roommate grabbed one, took a bite, and said, 'Wait, you made these?' The pride on my cousin's face was priceless, and suddenly these little cakes felt like way more than dessert—they were proof that we were proud of her.
Ingredients
- All-purpose flour (1 1/2 cups): This is your cupcake foundation, and measuring by weight if you have a scale makes them consistently tender every single time.
- Granulated sugar (1 cup): Don't skip the creaming step with butter—it's what makes these cupcakes light instead of dense.
- Unsalted butter, softened (1/2 cup for cupcakes, 1/2 cup for frosting): Softened means it should feel almost like clay when you press it, never straight from the fridge.
- Large eggs (2): Let them sit at room temperature for 15 minutes if you remember—they blend in more smoothly and create better crumb.
- Whole milk (1/2 cup plus 2 tbsp): The milk keeps things moist and tender without making them greasy.
- Baking powder (1 1/2 tsp): This is what gives you that gentle rise, not an aggressive dome that cracks.
- Salt and vanilla extract: Salt amplifies sweetness and vanilla makes everything taste homemade, not box-mix.
- Powdered sugar, sifted (2 cups): Sifting removes lumps and makes your frosting smooth and cloud-like.
- Mini peanut butter cups or chocolate squares (12 each): These form the actual cap structure and taste amazing alongside the vanilla cupcake.
- String licorice or sour candy strips (12 pieces): These become your tassels and add that playful detail that makes people say 'oh, that's clever.'
- Mini M&Ms or candy pearls (12): These tiny buttons on top of each cap are what catch the light and make them look intentional.
Tired of Takeout? 🥡
Get 10 meals you can make faster than delivery arrives. Seriously.
One email. No spam. Unsubscribe anytime.
Instructions
- Prep your station:
- Preheat your oven to 350°F and line your muffin tin with paper liners—this takes two minutes and saves so much frustration when you're pulling hot cupcakes out. If you have time, let your butter and eggs sit on the counter while the oven comes up to temperature.
- Cream the butter and sugar:
- Beat the softened butter and sugar together until it looks light, pale, and almost fluffy—this should take about 3 minutes with an electric mixer. You'll know it's ready when you lift the beaters and the mixture falls in ribbons instead of clumps.
- Add eggs and vanilla:
- Drop in the eggs one at a time, beating well after each one so they fully incorporate. Pour in the vanilla and mix until combined.
- Alternate the dry and wet ingredients:
- Whisk your flour, baking powder, and salt together in a separate bowl. Add half of this dry mixture to your butter mixture and stir until just barely combined, then pour in all the milk, then fold in the remaining dry ingredients—stop as soon as you don't see white streaks of flour.
- Fill and bake:
- Divide the batter evenly among your liners (I use an ice cream scoop for consistency) and bake for 18 to 20 minutes until a toothpick inserted in the center comes out clean or with just a few moist crumbs. Let the cupcakes cool in the tin for 5 minutes, then turn them out onto a cooling rack and wait until they're completely cool before frosting.
- Make the buttercream:
- Beat your softened butter until it's creamy, then gradually add your sifted powdered sugar a little at a time so you don't create a cloud of sugar in your kitchen. Once it's combined, add the milk, vanilla, and salt, then beat on medium-high speed for about 2 minutes until it's light and fluffy enough to spread.
- Frost the cupcakes:
- Use a spatula or piping bag to frost each cupcake with a generous swirl of buttercream. If your frosting seems too soft, refrigerate it for 10 minutes.
- Assemble the graduation caps:
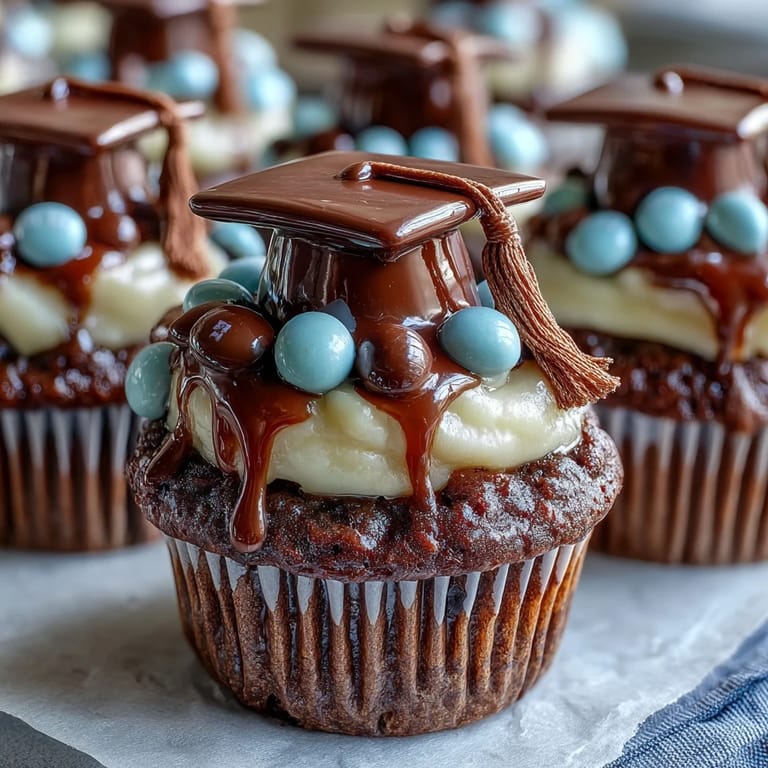
- Take a chocolate square and place it flat-side up. Use a tiny dab of melted chocolate or frosting to stick a mini peanut butter cup upside-down in the center of the square—this creates the graduation cap shape. Attach your licorice tassel to one side and add your mini M&M button to the top, using more melted chocolate to hold everything in place.
- Top your cupcakes:
- Once the caps have set (give them 10 minutes), gently press one onto the frosting of each cupcake. They should sit sturdy enough that they won't slide around, but not so heavy that they sink into the frosting.
 Save
Save The best part about these cupcakes isn't just that they taste good or look impressive—it's that they let you celebrate someone's big moment in a way that feels personal and thoughtful. I watched my cousin show these off to practically everyone at her party, and that's when I understood that sometimes the simplest recipes carry the biggest meaning.
Make-Ahead Magic
I've learned that you can actually bake these cupcakes a full day ahead and store them in an airtight container at room temperature, then frost and assemble them the morning of your event. This takes so much pressure off because you're not scrambling to get everything done at once. The frosting also holds up beautifully in the fridge for up to three days, so you could even make that the night before if you wanted to spread out the work.
Customizing for Your Celebration
One thing I love about this recipe is how easy it is to make it feel personal to the person you're celebrating. You can tint the frosting with food coloring to match school colors, or even swap the vanilla cupcake base for chocolate if that's what the graduate prefers. I've also seen people use different colored candies for the caps and tassels to create a really cohesive look that matches a theme.
Storage and Serving Tips
These cupcakes are best enjoyed within two days of frosting, though you can keep the unfrosted cakes for up to four days in an airtight container if life gets hectic. If you're making these for an outdoor party during warm weather, transport them in a cooler and frost them just before serving so the frosting doesn't melt into a sad puddle. For nut allergies, just swap the peanut butter cups for extra chocolate squares and you've got a completely safe option that tastes just as good.
- Keep finished cupcakes away from direct sunlight or heat sources, which will soften the frosting and make the candy toppers look sloppy.
- If you're making these more than a day ahead, freeze the unfrosted cupcakes wrapped tightly in plastic wrap—they thaw at room temperature in about an hour.
- Bring cupcakes to room temperature before serving so the frosting tastes creamy instead of cold and stiff.
 Save
Save These graduation cupcakes are proof that you don't need fancy skills or complicated recipes to make moments feel special. Every time I make them now, I'm reminded that celebration is really just about showing up for someone and putting a little thought into it.
Recipe Questions & Answers
- → What ingredients make the frosting smooth and creamy?
Butter, powdered sugar, milk, vanilla extract, and a pinch of salt are whipped together until fluffy to create the smooth buttercream frosting.
- → How are the edible cap toppers assembled?
A chocolate square is placed flat, a mini peanut butter cup is attached upside-down with melted chocolate or frosting, then a licorice tassel and candy button are added to complete each cap.
- → Can I make the cupcakes nut-free?
Yes, substitute peanut butter cups with chocolate square candies and select nut-free licorice or candies to avoid allergies.
- → What’s the best way to store these cupcakes?
Store in an airtight container at room temperature for up to two days to maintain freshness and texture.
- → How long does the entire process take?
Preparation takes about 25 minutes, baking around 20 minutes, plus cooling and decorating time for the toppings.